Nonprofits are often strapped for funds, and though it’s always best to hand the job off to professional web designers, sometimes that is not possible. [UPDATE: We have launch a new program for nonprofits that might help with affordability, please check to see if you qualify here.] Same with a small business with a small budget. In those instances, going DIY can be successful. Follow this tutorial, or hand it off to a volunteer. With this, it’s easy to create a WordPress website, just follow these steps to go from no website to live website in 30 minutes – let’s get to it:
Step 1: Get Hosting and Domain
First come up with a blog or website name, and then think of a rough idea of your goal or mission — can you fit it into 5-7 words? Good, that’s your tagline. I will tell you later where to put that, but first let’s go buy your domain and hosting. Hosting, you’ll need to spend around $70, so bring a credit card, and your domain will be free.
If you have already bought your domain, you’ll need to change the nameservers to ns1.bluehost.com and ns2.bluehost.com before you buy hosting: call your domain host support to ask for help. If you used Godaddy, a popular domain host, here is their support number: 1 (866) 463-2339 .
 To purchase hosting and your domain, visit Bluehost here — we are an affiliate but I promise this host is so top notch and affordable, and it is the first recommendation of the developers at WordPress.org. When you reach the Bluehost home page, click on the green “get started now” button and follow this flow:
- Choose a plan (we suggest 1 year)
- Type in your new domain, Click Next
- Fill in Personal Info
- Choose Account Plan (Do not buy anything else)
- Insert Billing Info, Agree to terms
- Click Submit
Congratulations! You created your Bluehost account and locked in your new domain. You are half-way to a new website. Grab a snack and keep on going…Follow any next steps Bluehost requests to create a password, etc.. (hosts are always changing the flow up a bit), and if you encounter issues, call Bluehost at +1 (855) 984-4546. Their support team is usually responsive and helpful.
Next up, we’ll create a brand new email address with your new domain as the ending, so much more professional than yahoo or gmail.
Step 2: Set up a Custom Email
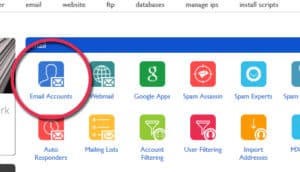
Ready? Revisit the Bluehost.com home page, and login (upper right corner) into your new Bluehost account, using your new username and password. You will be deposited into cPanel, the configuration panel for your new hosting account. Behold – this is your new web home, though you won’t really have to visit it that often. Don’t let the dozens of colorful boxes overwhelm you, you really only have to interact with a few in the life of your account – just be sure to visit account (upper right) and set your payment to renew. Once that is done, the first of the colorful cPanel boxes you need to tap is the blue “Email accounts” box.
Click, find your domain with the dropdown, insert an address (we suggest “hello” or “contact”), choose a password and save.
To check your email address, click on the “more” tab for that new address, and click on “Access Webmail.” Insert your new password, choose an email client to use (we like RoundCube), and bookmark that page to check your email regularly. Now that you have a working email address, let’s go install WordPress.
Step 3: Install WordPress
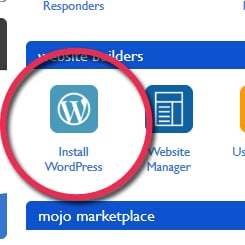
Return to cPanel, drop further down, and find the blue square “Install WordPress”. Click, and click again on the green “Install” button under the top “Do it Yourself for Free section. ”
”
Ignore any popup upsells, and find your domain in the dropdown under “Select which domain you would like to install to:”
If you don’t have a preference, choose the domain without the WWW.
Click on “Check Domain.” Bluehost is checking to be sure your host folders are empty – if you have actually added files to your server, you might get a warning. You can either proceed or call Bluehost (again, this flow might be a bit different now but the concepts are the same).
Now follow this flow:
- Click on Advanced Option
- Type in your Site Name (Keep it short, change it later if you’d like, this is not permanent)
- Remove the email address they inserted, and instead type in a new username without “admin” and not an email address. (Use something like “webkati” subbing your own name for Kati of course.)
- Type in a 12 character password (you can keep the suggested password if it is long enough but I would remove “i” and “L” and “1”, those get confused.)
- Accept terms and click Install.
The progress bar on top will keep you informed. Again, any issues, just call Bluehost but typically in a few moments you’ll be served a cheery message that “Your install is complete!” Cut and paste your login credentials that you just created, as well as the new WordPress link they gave you, and save them on a sticky or text file on your computer because you will need them to login frequently to your brand new site! Congratulations. Stop, have a sip of water, and then let’s go visit your new WordPress site.
Step 4: Set Up Your Site
WordPress Backend Basic Settings
To visit the backend of your new WordPress site, you can use the login URL they gave you , which is just your domain and add “wp-admin” after a slash. Bookmark that because that is your WP login page and it is the way to enter your site to edit and write posts. So login now, enter your new username and password (remember your credentials?). Here are a few things you want to do to set up your WordPress install before you add your theme:
1. Click on your “Howdy” message upper right, click on profile and pick your favorite color combo for the backend of our new site, check “Show Toolbar”, type in a “Nickname” that you want to be visible as an author, and select it at “Display name publicly as”.
2. Back to Dashboard, from left menu, click Settings, choose “Permalinks” and change the selection to “Post Name”
3. Visit Settings, choose “General” and insert your true site name here (Ex: ours is Bethesda Design Web), and add your tagline below, that 5-7 word description I mentioned earlier. Some themes show it; some don’t but sometimes Google will find it and rank you with it so use proper keywords, perhaps use Google Keyword search tool to fine tune. Now save changes.
Step 5: Adding your Theme
Adding Genesis & Your Chosen Studiopress Theme
We strongly encourage you use a StudioPress Genesis child theme — good ones for nonprofits are Digital Pro , Altitude Pro , or Atmosphere Pro .
Using a child theme creates a kind of sandwich, putting your custom design on one layer, and the core functionality of WordPress on another so when the WordPress core code is updated — happening more often these days to protect against the ever-strengthening hackers — your design will not break which does often happen with non-child themes. Studiopress Genesis is known for being one of the highest quality child theme frameworks. It is not free, but you can buy both the framework and child theme for a nominal price which will give you high quality and flexibility to serve you well for a long time. You buy a Genesis framework and a child theme as a package.
So when you are ready to buy your theme and install, take these steps:
1. Browse to your theme page, possibly Digital Pro , Altitude Pro ,or Atmosphere Pro, then click on the green button “Buy Theme & Framework,” create your new Studiopress account, complete your purchase and download both Genesis and the child theme zip packages you just bought to your computer. Remember where as you will need to upload them to your WordPress site in a moment; do not unzip either Genesis or the child theme you chose.
2. Return to your WordPress dashboard. From the lefthand menu again, visit “Appearances”, choose “Theme”, click on “Add New” and then “Upload Theme”, browse to the Genesis zip package you downloaded to your computer. Click to upload the Genesis theme zip but do not activate it. This is a step unique to a Genesis child theme.
3. Next, again click on “Add New” at the top of your screen, still in Appearances > Themes in your dashboard, and then choose “Upload Theme” again, and this time browse to your newly purchased child theme zip package, upload that and now you can activate that theme, the child theme, but do not activate the Genesis theme. That just sits there, never to be activated, but ever helpful to you and your site, let me tell you! And now you have a theme installed! Good for you!
Want to see your newly dressed site? From your WordPress dashboard, click on the name of your site in the upper left of the dashboard and peek at your site all dressed up in your new theme. Doesn’t look like much, does it. That’s because you still have set up to do — create pages, create a navigation, add widgets.
Don’t panic. Fortunately, Studiopress does a marvelous job of offering step-by-step theme tutorials so return to your Studiopress account when you are ready to do some serious set up. Want some help with this set up? Well, you are not alone, many people have emailed us for this service so we set up a formal process here:
Step 6: Begin Writing
Once your WordPress settings are correct and your theme appears as you want it, it is time to add some content! Here is how to begin:
Login again at your domain/wp-admin, using your username and password you set up when you installed WordPress in Step 3.
Both blogs and websites need “pages”; blogs alone can have both “posts” and “pages.”
To create pages, look to our dashboard vertical menu, and choose Pages > Add New. We suggest you create an “About” page, as well as a “Contact” page, and then any others you feel you need. To fill them with content, find your new page under “Pages”, click on “edit” and follow this flow:
- Add a Title
- Type in Text
- Click Publish (on the right)
Once your pages have text content, you should also write blog posts, but first you need to set up categories, etc. You can learn how to do this in a one-on-one session with us. We hope this tutorial has helped you and your nonprofit achieve an online home. If you have, let us know via Facebook or Twitter ! It is a great achievement and we want to help you spread the news of your new online home!


